-
 How to use API affiliate marketing tips05.8.2022Reading Time: 8 minutes
In order not to drown in the information flood, we’ve prepared for you a detailed API review. How can you use it, and why?
Let’s go!
Table of content
What is API, and how does it work
How can API help an affiliate marketer
How to send leads to AdCombo via API
Adding pixel to Success page
Landing page structure
How to upload a landing page to a hosting
How to rename your websiteWhat is API, and how does it work
Application Programming Interface – is a part of a server that gets requests and replies to them. We can say that this is a language that the programs use to communicate with each other.
And if we are more specific and adjust the definition to the boundaries of affiliate marketing, we will get this:
API is when you (actually your landing page) send a request to adcombo with customers’ data, and we (actually the server) respond that all data was accepted or not accepted and display it in the statistics page.
How can API help an affiliate marketer
- Forward the leads to an affiliate network
- From downloaded landing pages
- From own unique landings
- Automate ad campaigns creation and media buying
Today we’re going to talk about the first case.
How to send leads to AdCombo via API
Let’s do it in an order
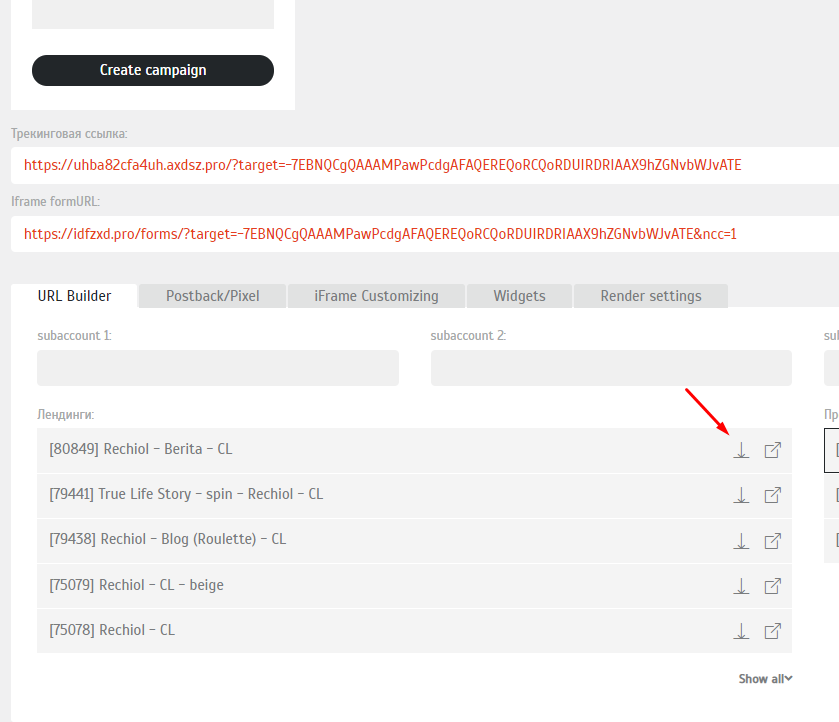
- Download the landing page
- Unpack the archive with the landing page to your hosting
- Connect the domain to the landing by adding A\CNAME in the registrator.
Ready! Now you can run traffic.
We understand that newbies may be wondering: “Is this that easy?”
Yes, this is really not that hard. The thing is that, when downloading the landing page, the rest of the data is pulled up along with it, such as:
- API key
- SubID
- Facebook and TikTok pixels
The pixels are automatically added to the landing page code if you specify them in the AdCombo offer page and then download the archive with the landing page ( if you haven’t done this, we will tell you further).
Adding pixel to the Thank you page
In your personal AdCombo account go to the “Offers” tab, select an offer and open the “Postback/Pixel” tab
Insert the pixel code in the “Pixelcode for leads on success” field. This pixel will be fired on the success page after the customer completes the order.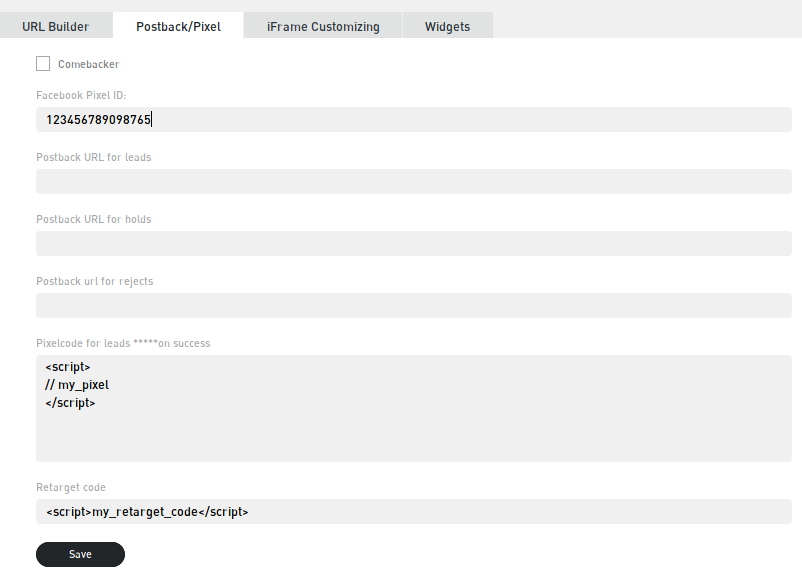
After adding the pixel code, click the ‘Save‘ button.
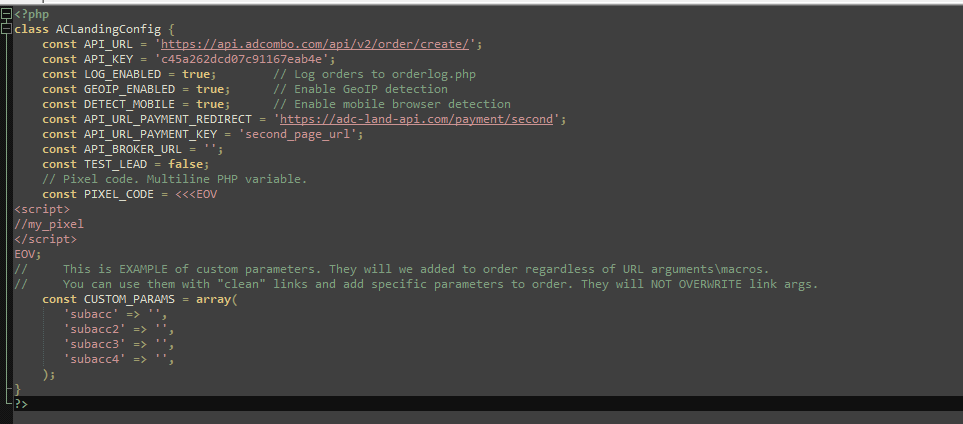
Now your pixel code will be embedded in the downloaded landing page of this offer. The pixel itself is in a config.php file, in the ‘PIXEL_CODE‘ parameter. If necessary, you can correct the code manually, or insert it into the file yourself.
By the way, it will be convenient to check the presence of the pixel on a page using extensions.
- For FB: https://chrome.google.com/webstore/detail/facebook-pixel-helper/fdgfkebogiimcoedlicjlajpkdmockpc
- For TikTok: https://chrome.google.com/webstore/detail/tiktok-pixel-helper/aelgobmabdmlfmiblddjfnjodalhidnn?hl=en
In this case, the API is already configured for you, it will “ask” us to create an order in the system.
If your programmer skills are slightly less than “hello world”, then this instruction should be enough. We don’t recommend making changes to the landing page code. The golden rule says: “If it is working – do not touch it!”
However, it will be useful (but not necessarily) for any affiliate to have basic knowledge to understand the structure of a landing page, change the visual part, adapt scripts, and automate processes (getting back to the second point). Next, we’ll talk about what the AdCombo landing page consists of.
Landing page structure
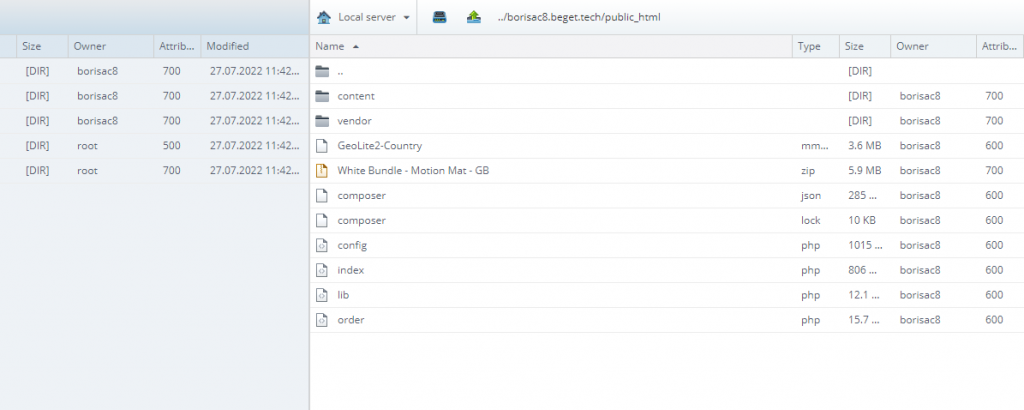
The structure of AdCombo landings is usually the same:
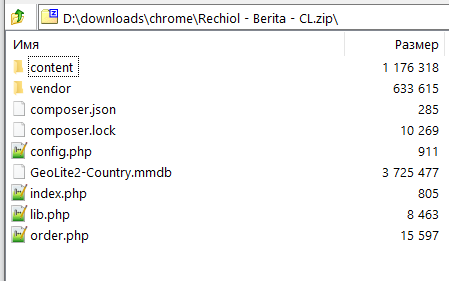
- The “content” folder contains the landing page code and its visual part: styles, images, and scripts;
- The “vendor” folder contains various libraries that support the functionality of the landing page. Among other things, there are libraries for determining GEO by IP address, user device type (desktop/mobile)
- File index.php imports .php libraries and helps to determine the type of user’s device, and depending on this, displays the mobile or the desktop version.
- The dynamic parameters of the landing page are placed in config.php. It is this file that, when downloading the landing page, is filled with a personal api_key, a link to which a request will be sent at the time of creating the lead, a retargeting pixel code (if specified in the offer interface), and a SubID.
So, if you didn’t add the SubID or pixel code before downloading the offer, you are still able to do it in config.php
Config.php file contains custom parameters that are transmitted via the API in a form of ‘key’ => ‘value’ and are added to the array automatically. Here you can place, for example, UTM tags, subaccounts, or any other custom parameters.
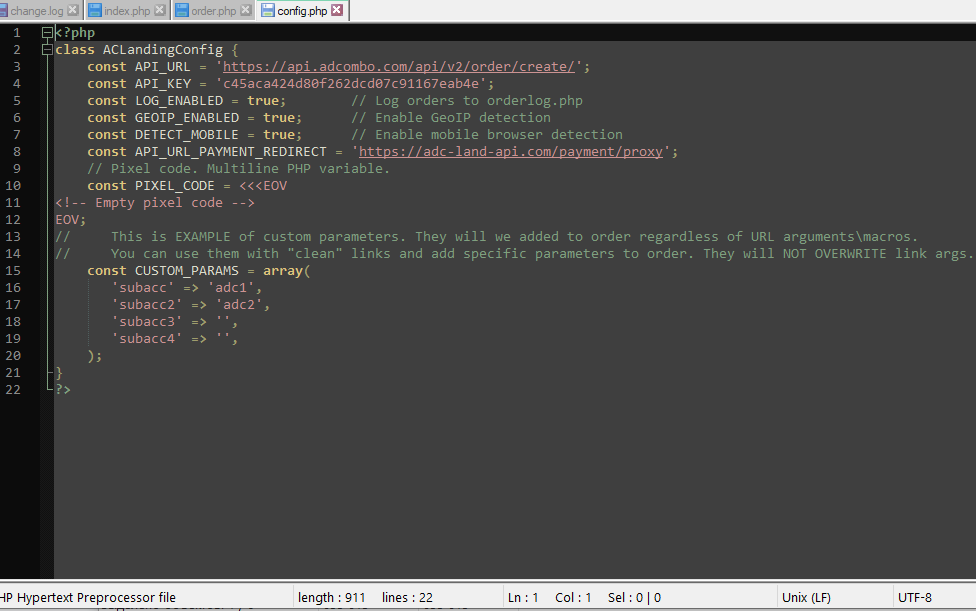
IMPORTANT: parameters from config.php OVERWRITE the data received from the landing page URL. To pass data from a link, the argument values must be left empty (or the lines must be deleted altogether).
- Order.php – is a file that imports the Success page or “Thank You Page” at the moment when the data is successfully sent to the form. HTML markup (typical for all AdCombo landing pages) is contained in this file. Edit the Success page can also be found here.
- Orderlog.php – is a file that collects orders from the landing page exactly as they are sent via the API, as well as response statuses for each lead.
How to upload a landing page to a hosting
Let’s look at the example of beget, how to upload a landing page to a hosting. We will not write which hosting and plan to choose, or how to sign up. In this article, we will focus on uploading a landing page to the host.
Use the host and click on the file manager. We used Beget as an example.
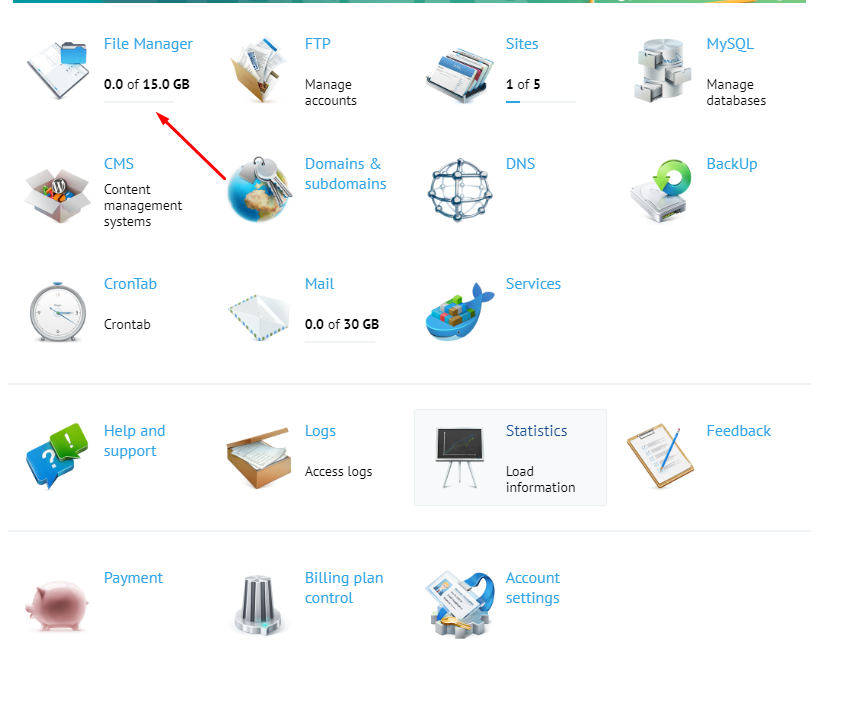
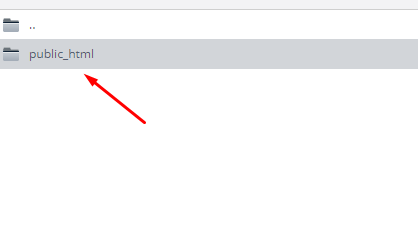
Hosting provider already has a folder with the name of the site and with the same domain name. You need to open the folder. Inside it, then add a public_html folder, if one isn’t there. We will unpack the archive here.
If there is any content in this folder already, feel free to delete it. Next, click the Right Mouse Button on a free space and then “Upload files”. Select the archive. Upload. After that, click the RMB again, but this time on the uploaded archive and use the “Extract archive” button.
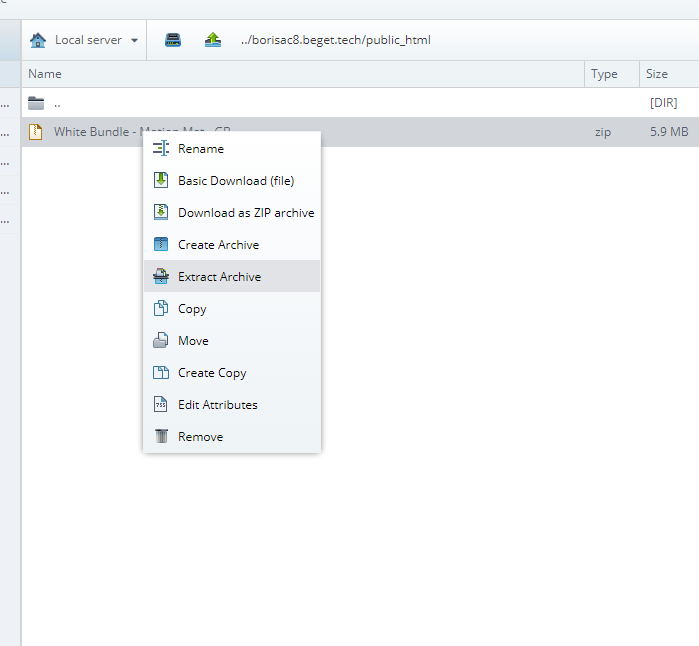
Done!
The site is uploaded, all the above files are in. Now the archive can be deleted.
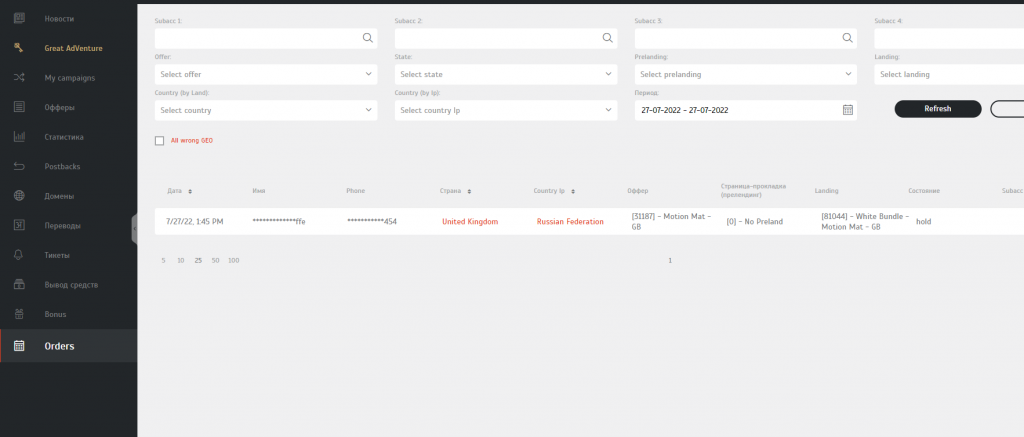
After signing up at the hosting, we’ve got a free domain. Usually affiliates don’t use them, but now we just need to make sure that everything works. To do this, go to the address and see if orders are being sent.

The landing page is working correctly. Now you have to make a test order…
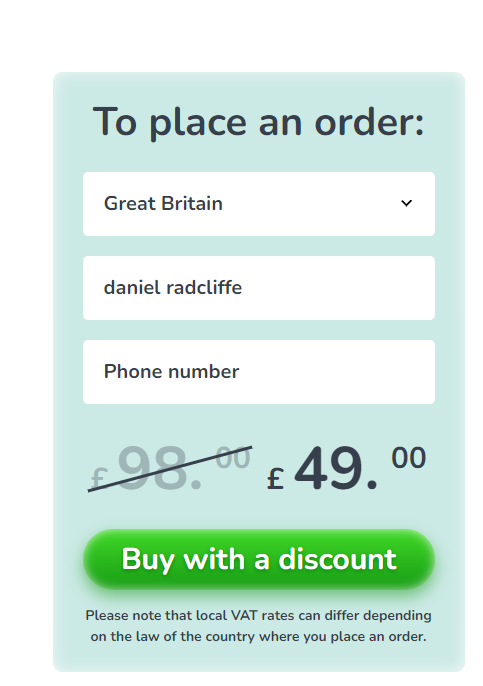
a-a-and
It works! Congratulations, now you can upload a landing page to a hosting yourself! As we warned you it was easy 🙂
If suddenly this article is read by an experienced affiliate or guys with a good knowledge of programming languages, then the AdCombo knowledge base has an exhaustive page with all the necessary parameters for working with an API. You can read it here.
How to rename your website
Now let’s figure out how to link your domain name to the website.
For hosting, a website is a folder that is stored on its server. To open the desired website in a browser window when typing a domain, you need to connect this domain to the website.
There are 2 cases here:
- You bought a domain and hosting on the same service. Then most likely the hosting will automatically pick up the domain and you will not need to do anything else with it;
- Domain and hosting are purchased on different services. In this case, you need to link the domain from the service to the folder with the website on the hosting. This is done through DNS settings. There are also 2 options here:
- Register NS hosting records in the domain settings on the registrator’s website. In simple terms: tell the hosting service where you bought the domain, and that now we will manage the DNS records of our domain from the hostings website.
- Register a CNAME hosting record in the DNS domain settings on the registrator’s website. So we just tell the registrator that the content from this hosting will be displayed by this domain name.
It may seem a little difficult, but this is so-called BASE. We haven’t dived deep into the concepts of DNS, NS, etc. yet (or maybe we just don’t know 😁 ).
Each hosting and registrator has its own interfaces, so to link a host with a domain name, you will have to go through different paths. But the point is the same everywhere. And there are instructions everywhere. But for the purity of the experiment, we will show how to change the domain name in our example.
So, we have a folder with a website on beget and a test domain domain-for-api-article.icu/, purchased on ahnames.
In the main menu on the host, go to the “Domains and subdomains” section

In an interface that opens, you need to insert the domain name and choose what to do with it from the next 3 options. Choose the last one right away.
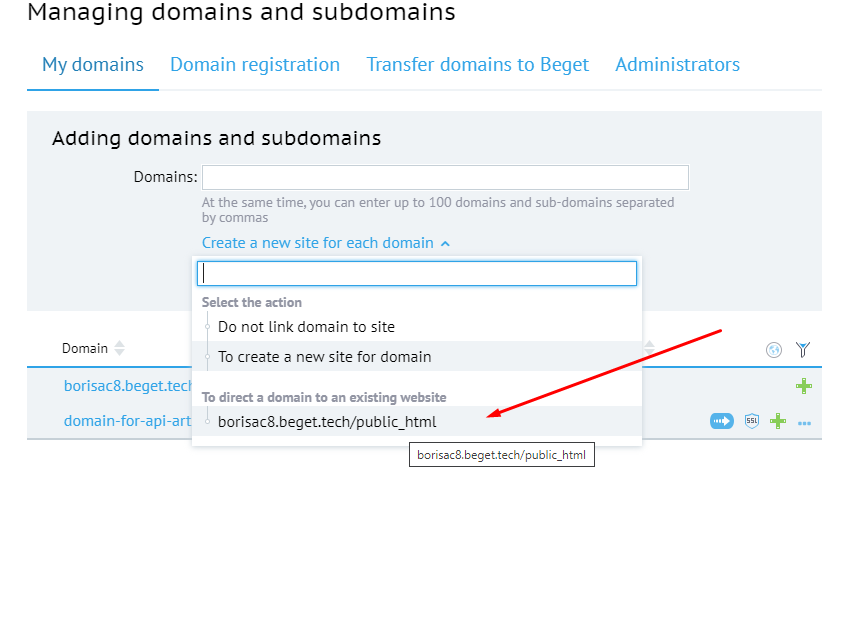
If you have chosen another one, you will still be able to attach the domain in the site settings later. Now go back to the main menu and go to the DNS section. Copy the addresses of the A record
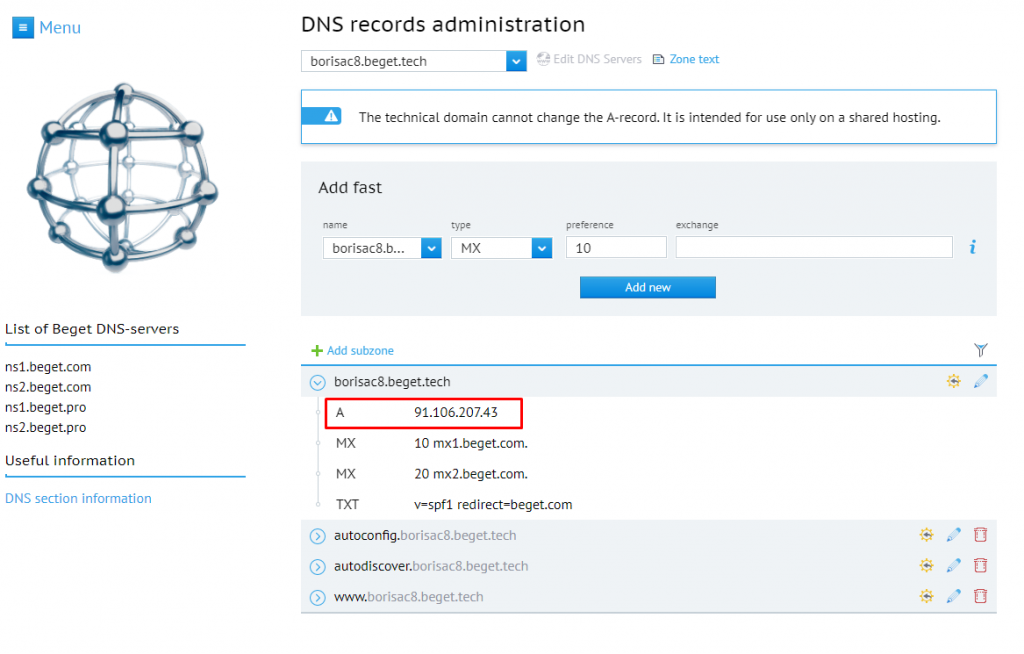
After that, go to the domain registrator’s website, also go to the DNS section and create a CNAME record of type A and the name of the www subdomain.
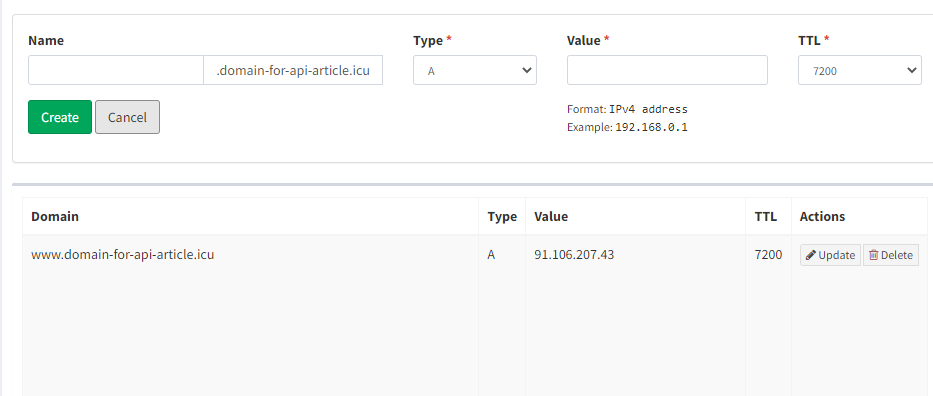
Save and wait 10 minutes until the cache is updated.
Then go to our address http://www.domain-for-api-article.icu / (this is the test domain we used for the article. You need to go to the address of your domain) and see that everything is displayed correctly. For more confidence, we can leave the test lead and check that it is displayed in the statistics or orders column. Everything is ready, now you are a real hacker and you can run traffic via API.

So, today we`ve learned what an API is, how and most importantly why to run traffic via API, how to download and upload a landing page to a hosting, and finally, we got to know how to pick up your domain name for the land. All these things should be known by every self-respectful affiliate. As we have already written: THIS IS THE BASE. Without understanding the mechanisms of affiliate marketing, it is impossible to succeed in it.
In our next publications, we will tell you how to run traffic via API using a tracker. This topic has many nuances, so it deserves one more publication. And also, we will teach you how to transfer leads via API from your own and not Adcombo’s landing pages.
We hope that this article was useful for you. If yes, reward us with likes and subscriptions on our social networks. Good luck and profit to you all!
- Forward the leads to an affiliate network


Leave your comment