-
 WANT TO KEEP YOUR PIXEL OUT OF BAN? HERE IS THE STEP-BY-STEP GUIDE TO SUCCEED19.11.2019Reading Time: 2 minutes
Well, master pixel isn’t Jackie Chan in the world of Facebook. It’s an easier thing.
The master pixel is a pixel created on a stand-alone Business Manager for sharing with other accounts to collect ever more data and store it in one place (Manager). In other words, it’s the primary pixel connecting all your accounts’ data. It isn’t a newly born term, it’s just the way to name the core pixel.
What superpower does it have?
1. It extends your audience data and supplies the pixel with findings;
2. It saves the pixel performance after it has been banned.
How to set up a master pixel correctly
Step 1
Log in to or create a new/whitehat profile. Then start a new Business Manager. It’ll perform as the master pixel. By the way, it isn’t necessary to drive any traffic from it.
Step 2
Create a pixel on the selected BM. Of course, you can do this at the account level but, in this case, keep in mind that you’ll have to run ad campaigns from time to time. Otherwise, BAN, PLEASE! (for being inactive, eh). Moreover, you can decide upon settings, events and other details on your own. All this stuff doesn’t actually influence the method efficiency.
Notice:
You can share only an active pixel. That means it’s already fired and its color is green.
Step 3
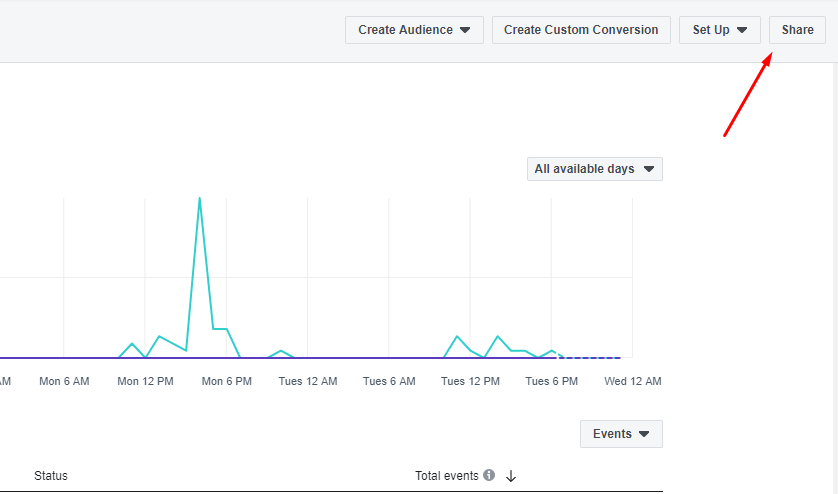
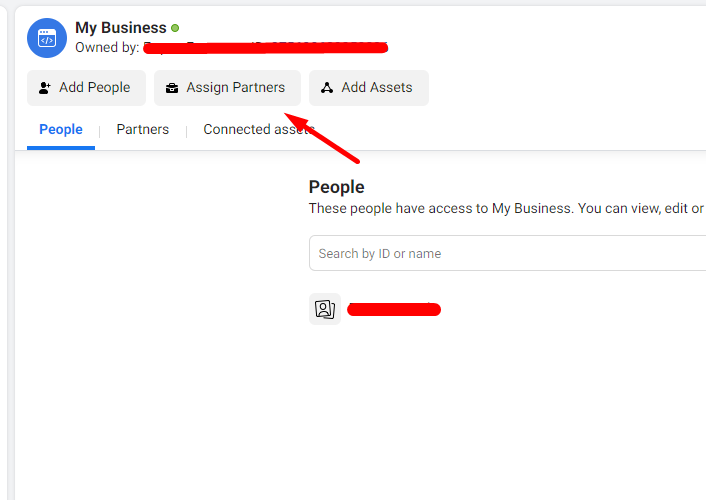
Enter Business Manager → Events Manager → select the pixel you want to share→ click «assign partners» → enter ID of a BM that you want to share with → sharing permission→ click any tick;

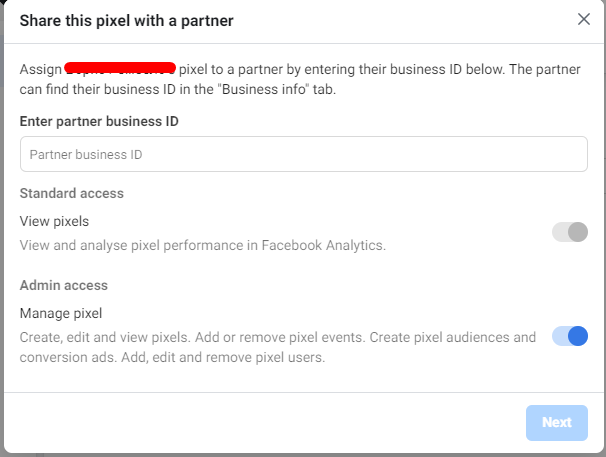
For new users:
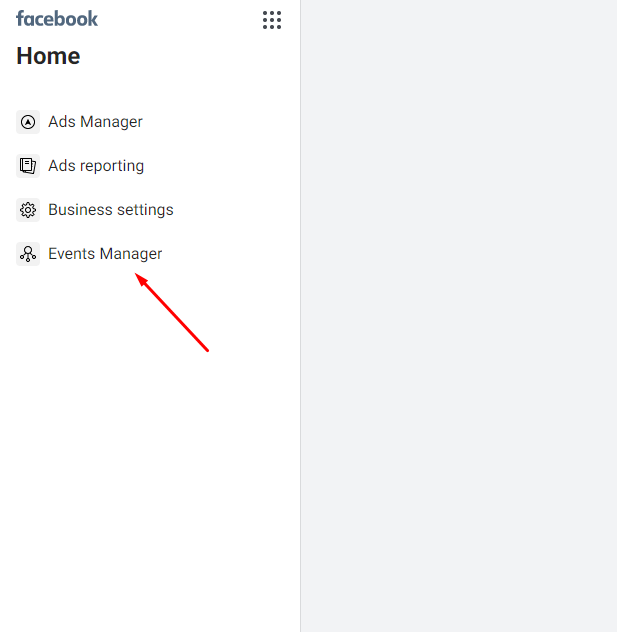
• If you’re unable to find pixel or Events Manager – use this link.
• A Business Manager ID to share can be found by entering the main page of BM and copying the numbers following «business_id=» in the address bar.
• Sometimes, when ID sharing, you can face the warning notification which requests you to register the company. Ignore it, the pixel’ll be shared anyway.
Step 4
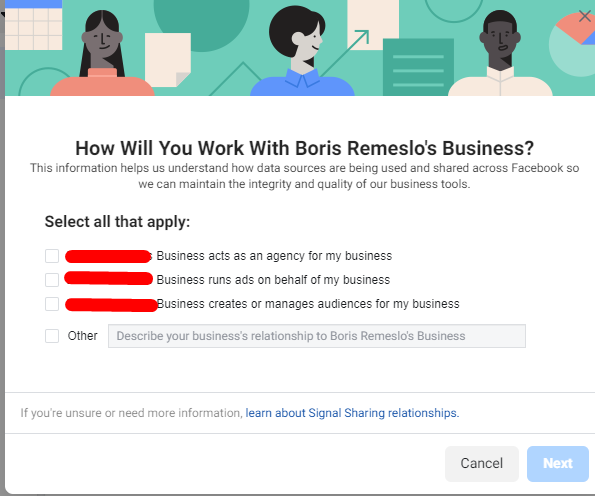
Having done all the previous steps, enter the BM aka «receiver».
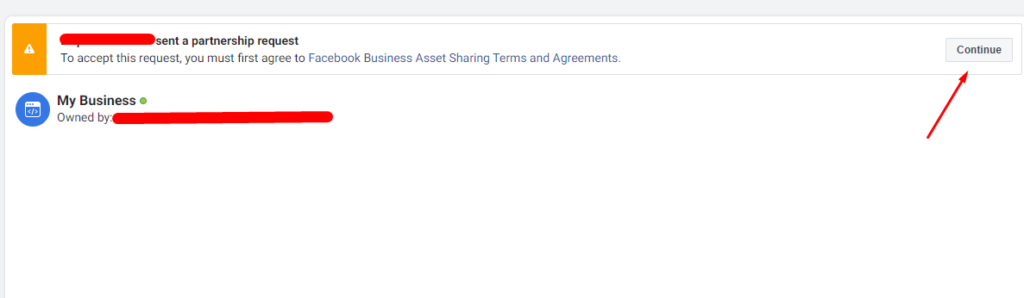
In the top right corner, you’ll see the notification that you’ve not been invited to manage the pixel. Click it and agree to its conditions.
Then…wo-hoo, the pixel is yours now.
If it’s needed, the accounts’ access can be disabled. That will be a good option, if they’ve been banned, for example. To do this, enter the BM where the master pixel is and select the same tab which you’ve assigned partners on (‘Partners’ tab). Then delete the accounts you don’t need anymore.
Now you can share your pixel with any other accounts without fear that it’ll be blocked and you’ll lose all your essential data!
Level up!


Keep this going please, great job!